


If you have a product based business here are product photography tips for shooting in your home.
I see frustrated small business owners every where in Facebook groups and forums and I wonder if you can relate.
It’s hard to figure out product photography lighting especially when you are doing your side hustle from home.
Right??
You’ve started your own side hustle. It’s growing and you’re loving your biz. You sell a product. Doesn’t really matter if it’s one you’ve created or one that you are selling from another maker.
You are making a go at using Instagram and Pinterest and other visual based platforms to market you business, but you’re constantly struggling because…. well, let’s face it. Your photos suck.
90% of information transmitted to our brain is visual and 93% of consumers consider images essential in purchasing decisions.
For those two reasons alone, you need to ensure your product photography looks good, otherwise you are wasting your efforts.
What do you do when your house has terrible light. Or maybe you need to take photos after you get home from your other job. And when you get home, there is no natural light to speak of right?
The thing is, it’s SO crazy important to have great photos if you want people to pay attention… and most importantly buy right?
So how do you get good product photography? Lighting is your answer.
You can do a fine job with your iPhone or Android, but you need to make sure you have your light figured out. And I’m here to help you figure this out!
What you’ll learn in this article about product photography lighting and tips:
1 – Why Windows are your best friend when photographing products in your home
2- Choosing your background, and how white is harder than you think
3- What to do when you don’t have good window light or shoot at night
So, if you are attempting product photography from your home, rest assured, you can create great photos and it can be rather simple.
You just need to make sure you have ample light. The light matters more these days than your equipment. And while you will get better results with an SLR than with an iPhone or Android, don’t think you have to go out and buy that SLR right away. You can master professional looking images for your marketing needs with your iPhone. Then upgrade to an SLR later if you want to go to the next level.
1 – Window Light
The easiest and fastest way to get great product photography lighting is by using a window that gets ample NON direct light. What do I mean by non direct light? It means that you want to pick a window when there is no direct sunshine streaming through. You want that light to be soft and you get that when the light is ambient and not direct.
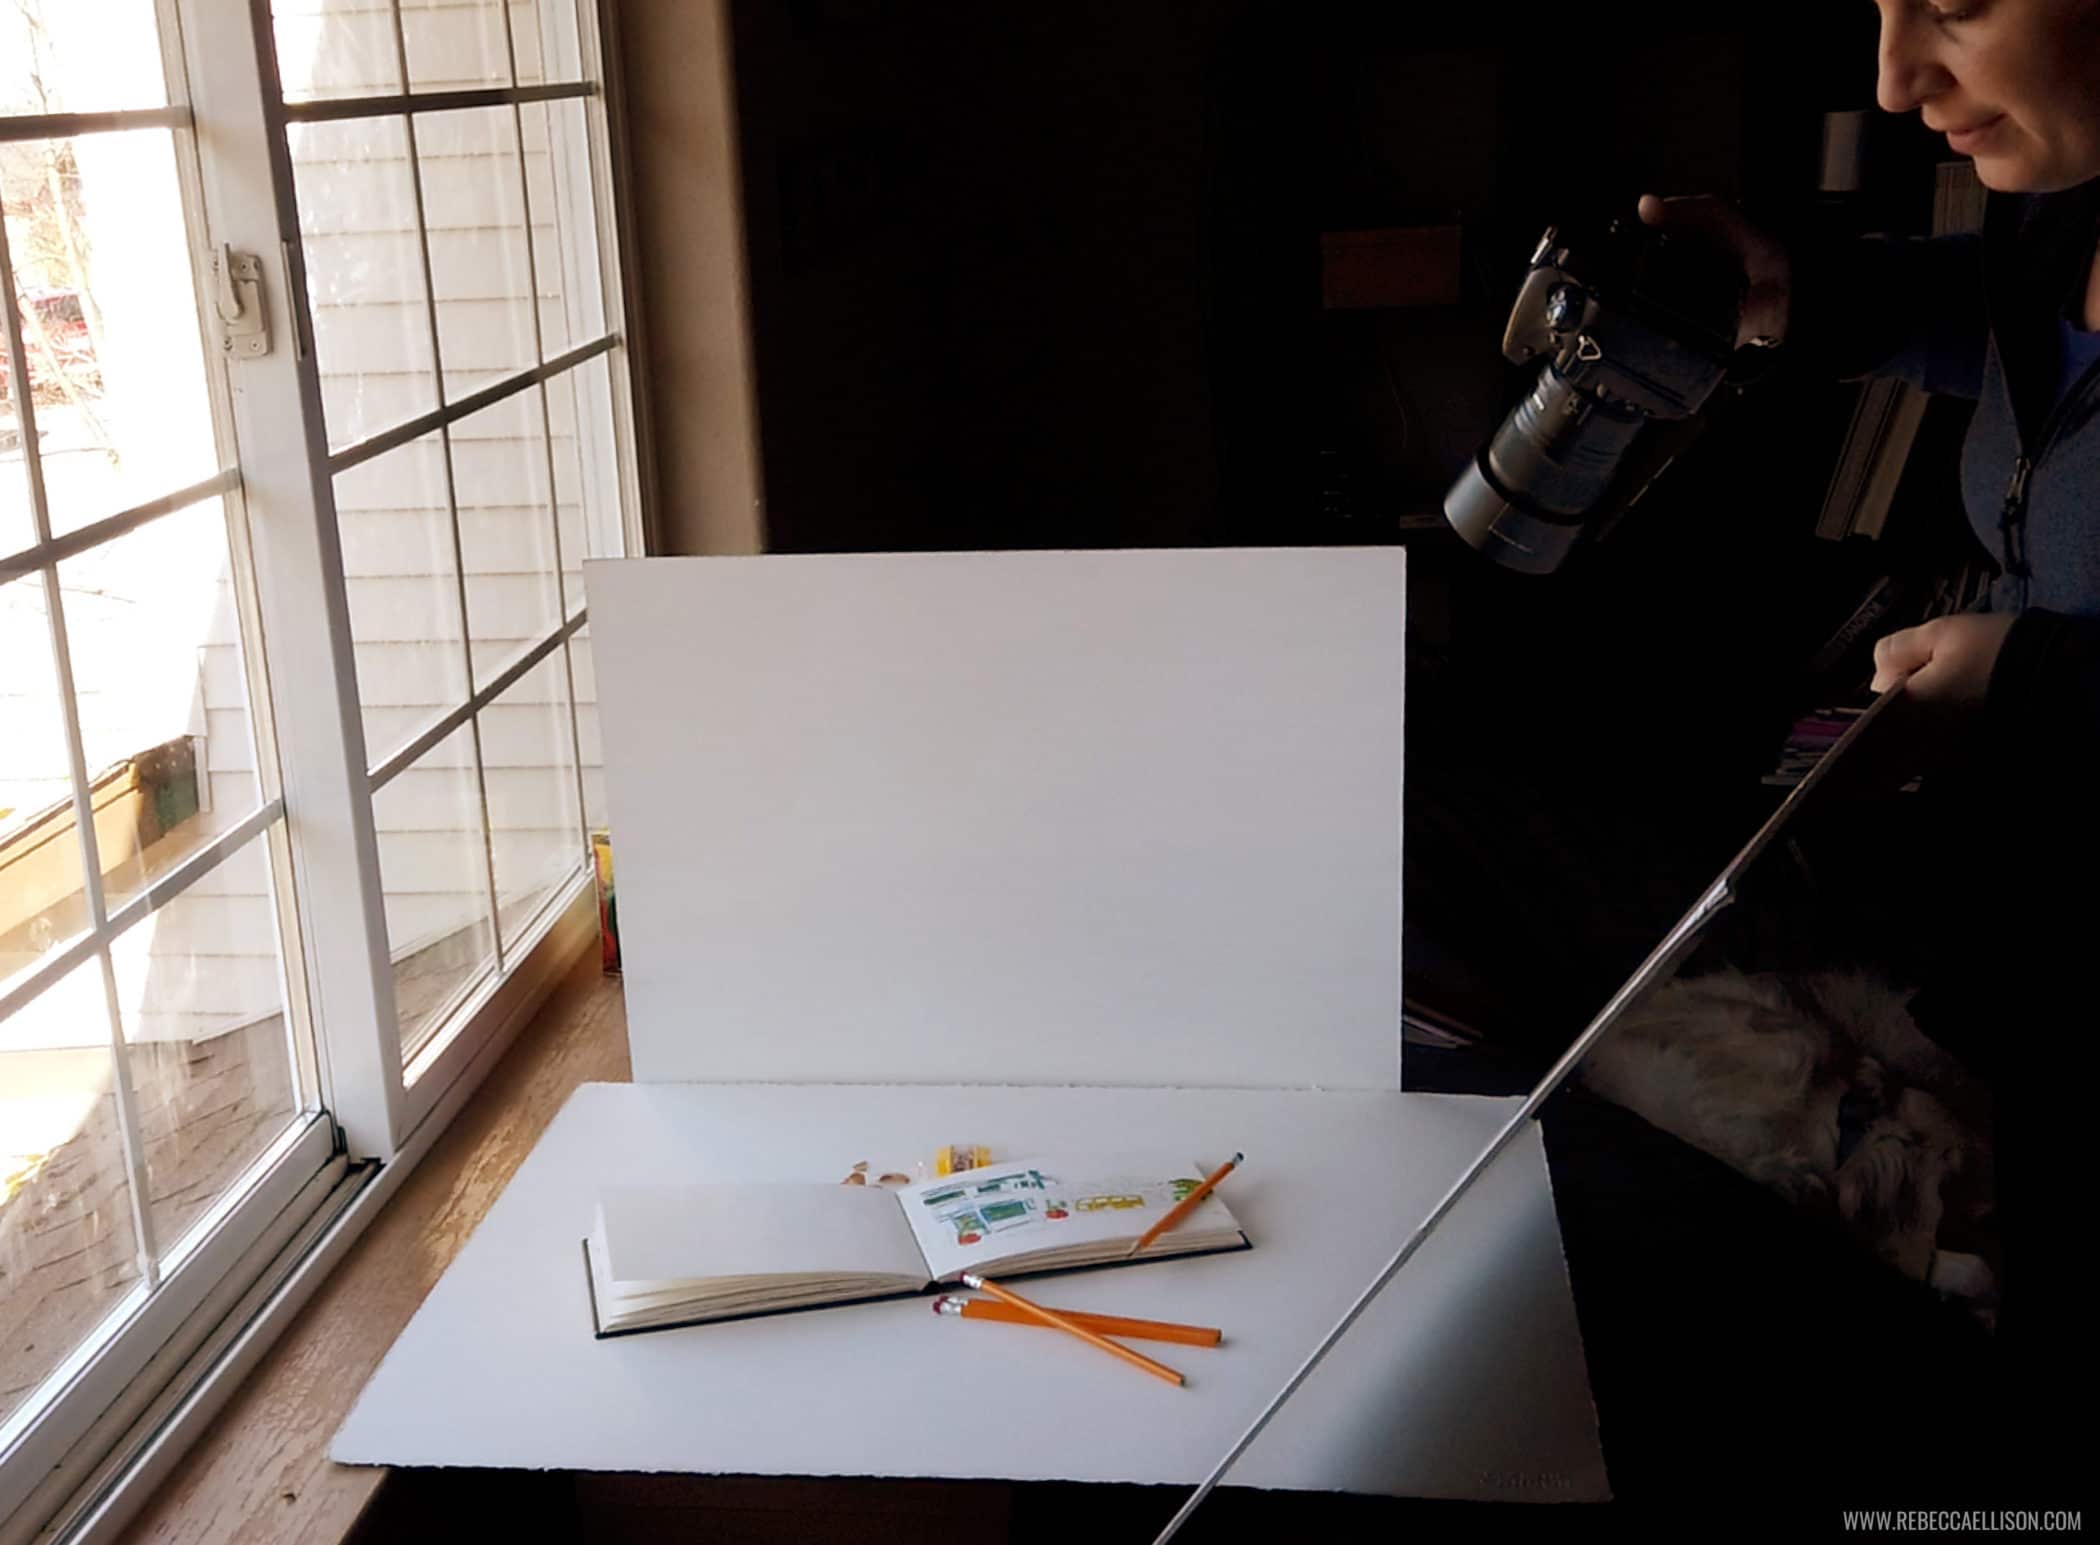
You’ll want to set up a background for your products. And it’s easiest to
set up a flat lay image so that you don’t have to worry about what is in the background. But if you have products that need to stand up on their own, then choose a window that has light coming in and a blank wall behind you. You want the background to not be distracting. If you can not get a fully blank wall, you can use the Portrait Mode on your iPhone to blur out the background, or open your aperture to blur out the background with your SLR.
The other option is to set up a seamless paper clamped to a stand so that the background doesn’t have a horizon line.
You will set up your background even with the edge of the window so that the bottom edge of the window does not create any shadows.
Then you will use white foam core from the drug store as fill cards. What they do is take the ambient light coming in the window and the light will hit the white card and bounce light back into the image helping remove the shadows and creating a more evenly lit image.
You make essentially a 2 or 3 walled “house” for your product of white walls and look down from the top to capture the image.
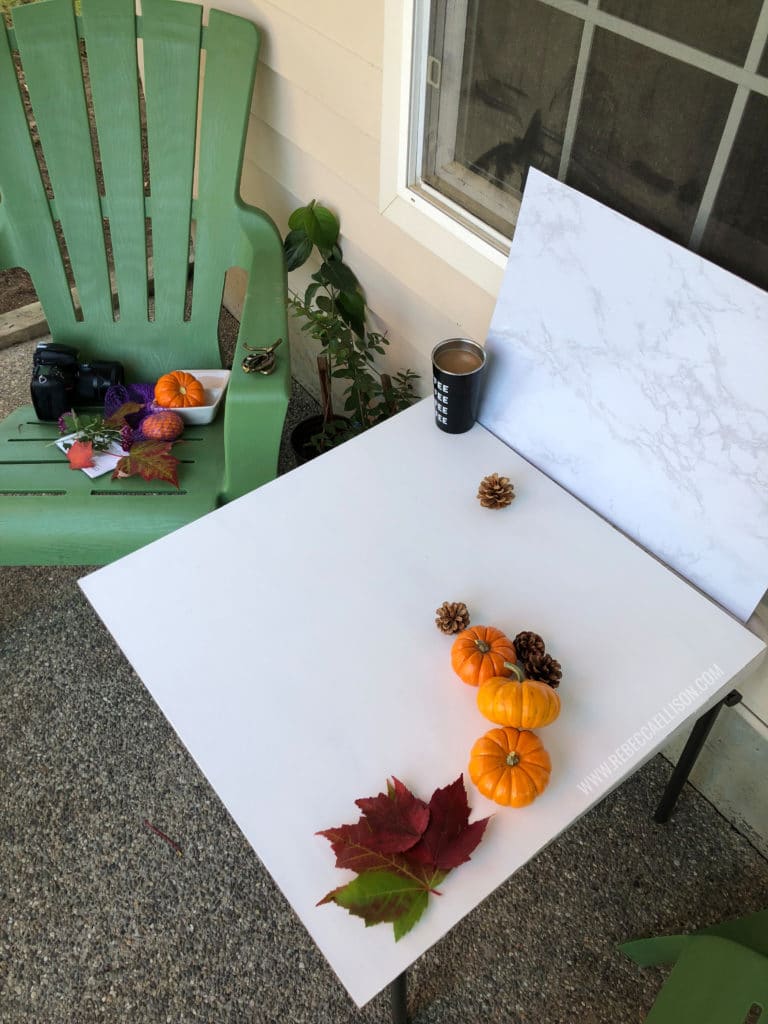
Another great option similar to window light is to work in open shade outdoors. I regularly will work on sunny days on my front porch as there is a lot of great ambient light but not direct light.
2 – Background
You see most people use a white background as that is what the last 15 years of e-commerce has taught us to use for our backdrops. It can make the product pop off the site that has a white background. But you don’t have to choose a white background.
Unless it’s a requirement by where you will be listing your product, I suggest beginning on a background that is NOT white.
A white background only looks good when it’s pure white, otherwise it can look dingy the second it’s up against a white website. The photos you see that are all white backgrounds are 99% of the time Photoshopped to be that white. They are not captured that way.
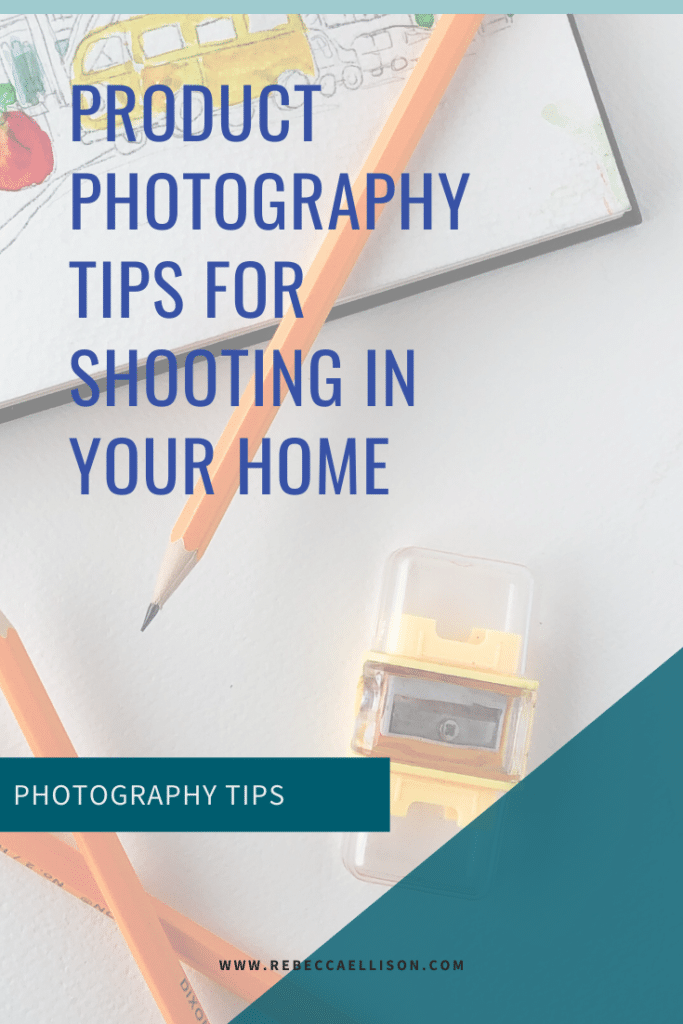
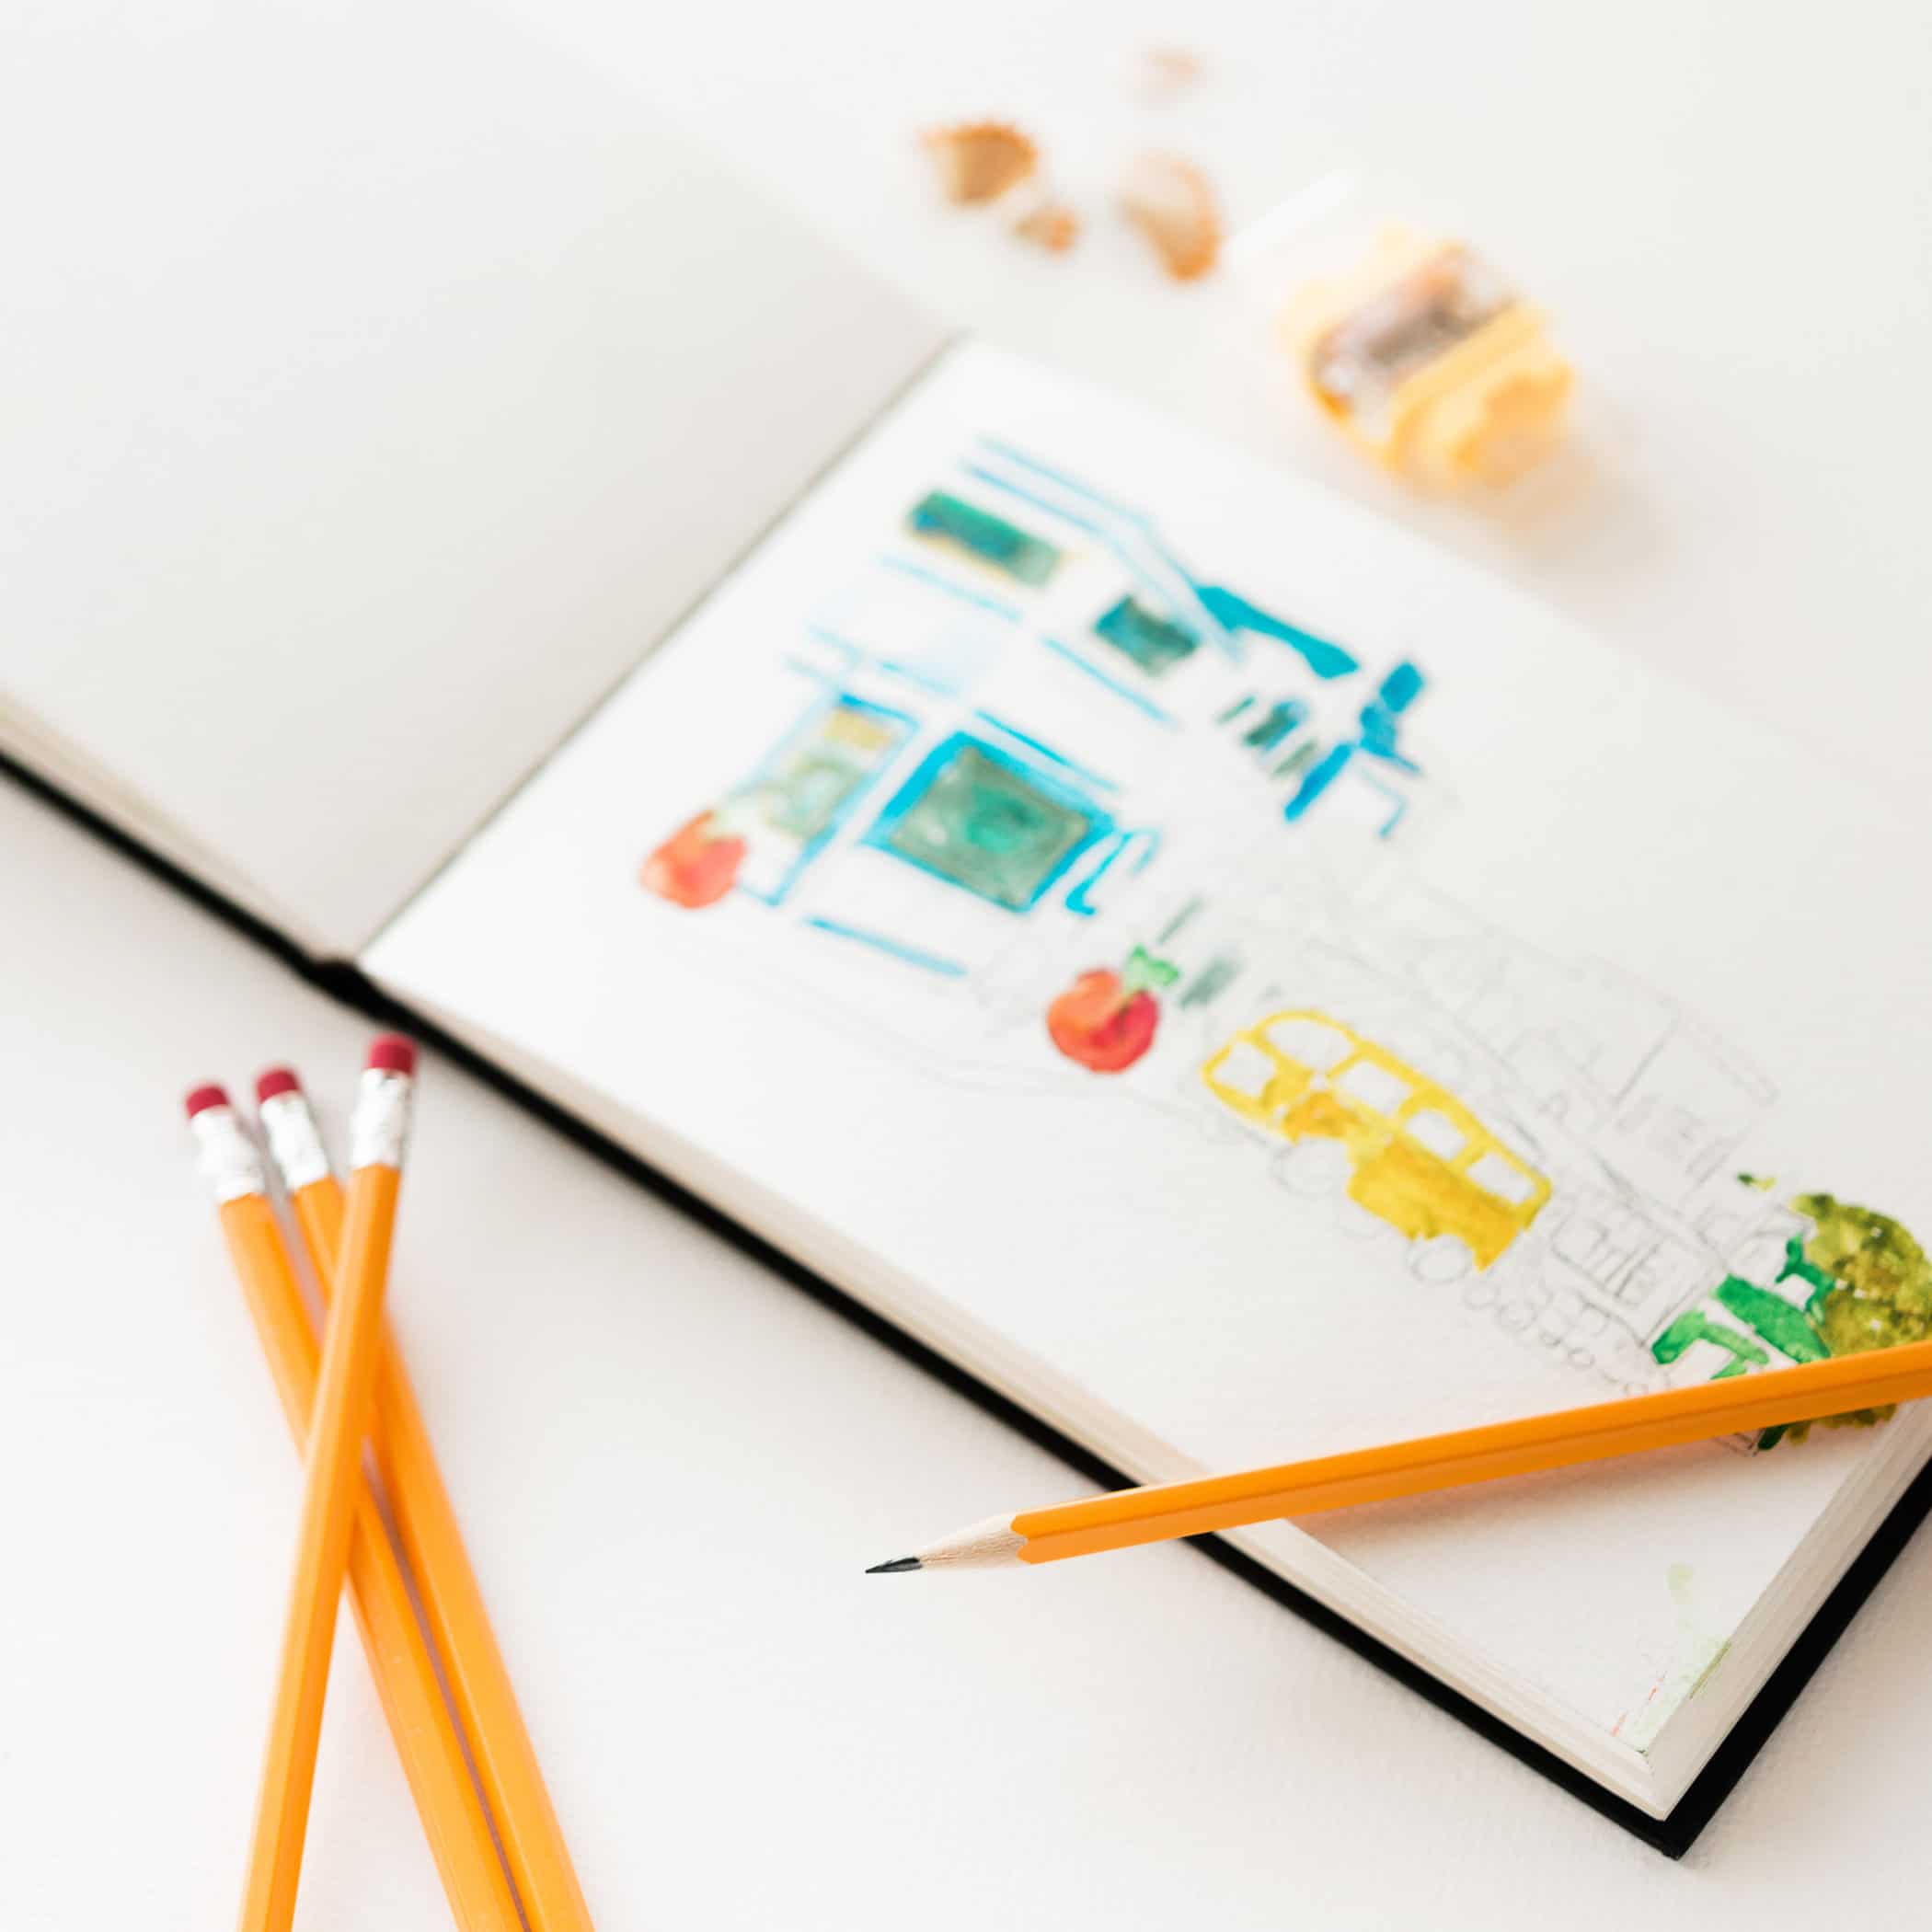
The photo above with the pencils and the sketch book is a good example of the white background not being purely white when looking at it against the white of a webpage. This was a white board but it still looks grey in comparison to the white of the webpage. Now, in this instance, it looks okay because this is more of an art image than a sales image, but you can see the difference of what it looks like when white isn’t pure white.
It’s nearly impossible to make a white background in camera (ANY camera).
You can’t get pure white in camera while also getting your product to be exposed well (meaning not too bright itself). It’s something done in editing, so if you are struggling to do it in camera…. give yourself a break, as it’s not going to happen. You are not doing anything wrong. It’s just not how it’s done.
So, if you are not going to shoot on white what do you use for a background?
 The options are really endless.
If you live in a home that has marble counter tops or textured floors or great table tops of any type, you are all set for options there.
You can use fabric or a blanket depending on what your product is. Glass or a mirror gives a beautiful reflection as long as you make sure you are not in the reflection.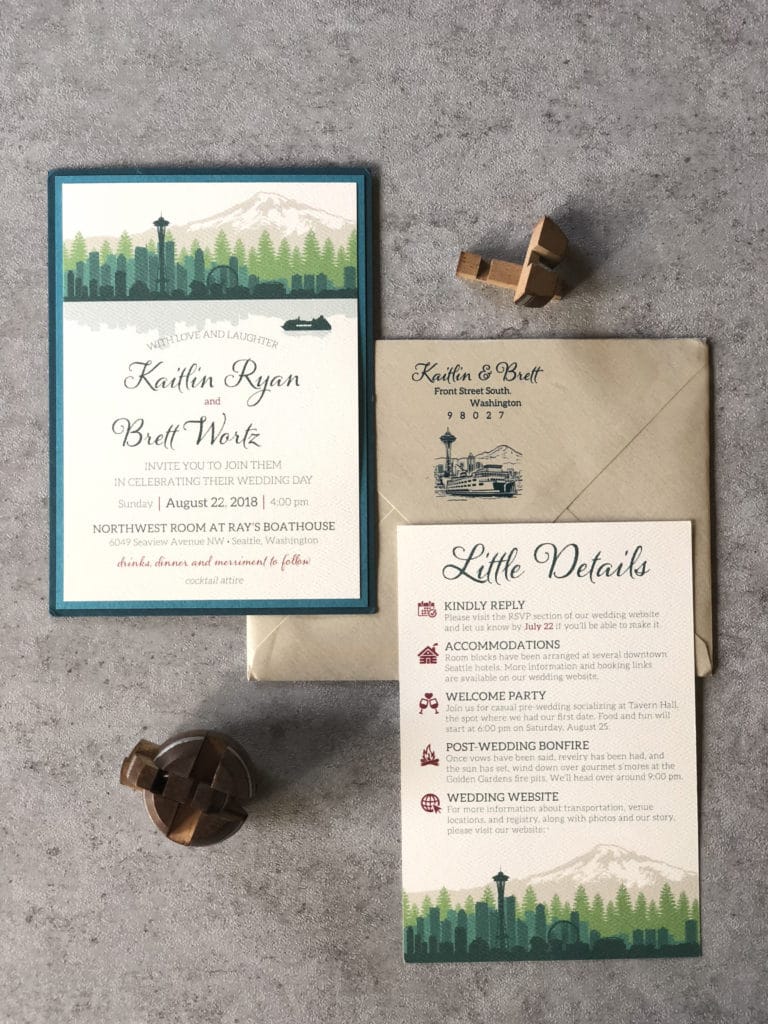
What if you don’t have the backgrounds you want organically in your home? You can easily create styling boards from contact paper and board stock. You can make it look like a large variety of backgrounds with different contact paper options and an hour of DIY . The photo to the left here are three separate styling boards I created with 15x20in book boards .I ordered off of Amazon (affiliate links) and marble contact paper also ordered off of Amazon. When ordering your contact paper, Amazon has the best variety. Keep in mind you want a matte surface not a shiny surface so that you background does not
I suggest choosing a neutral background or one that compliments your products. Make sure the background doesn’t compete with your products for attention in the photo. Type in contact paper in Amazon and you’ll be amazed at the amount of options. The Book boards are thick and sturdy cardboard so it will hold weight well while not being overly heavy itself. Match with the contact paper which is sticky on one side making easy to do styling boards.
The image on the right is a contact paper styling board that I used for this wedding invitation.
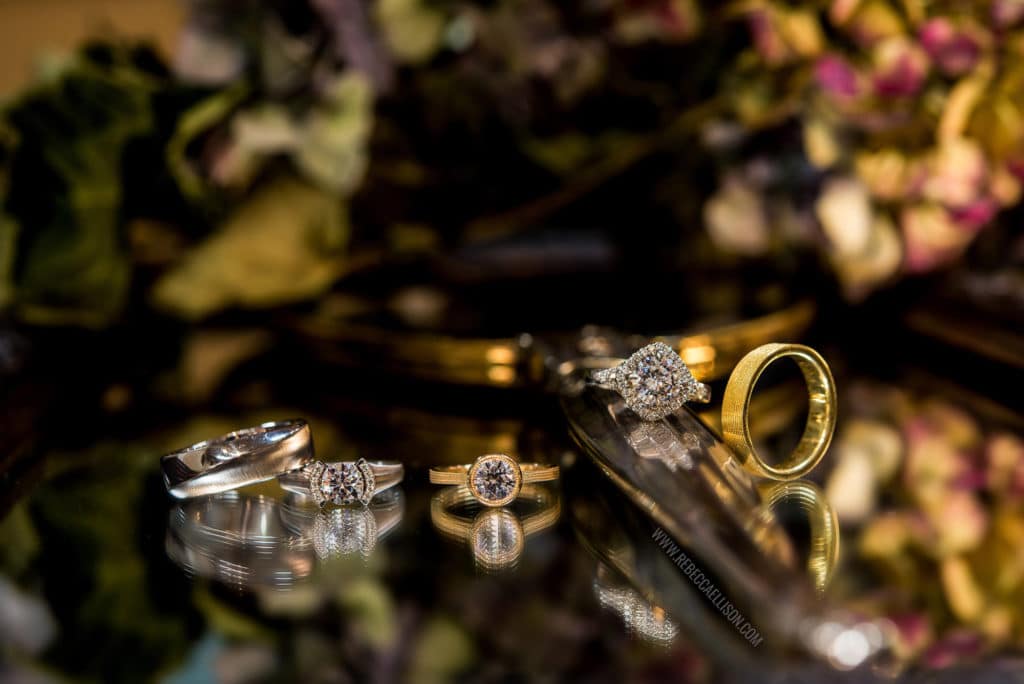
Glass or a mirror gives a beautiful reflection as long as you make sure you are not in the reflection. These rings were placed on a mirror and I shot looking into the scene. I used a dried bouquet of flowers in the background so we wouldn’t see the shop. Then I used a small handhold video light to light the scene. I used a lens that would blur out the background so that the mirror and the flowers would not be a distraction.
If you want to know how to make your own styling boards, read my tips on creating a styling board for product photography
3- Using Lighting Setups
You may be groaning to yourself if your home doesn’t have ample beautiful window light. I get it! More often than not, our homes don’t look like the ones splashed all over Instagram right? So what to do when you lack that beautiful light, or need to do your product photography after dark?
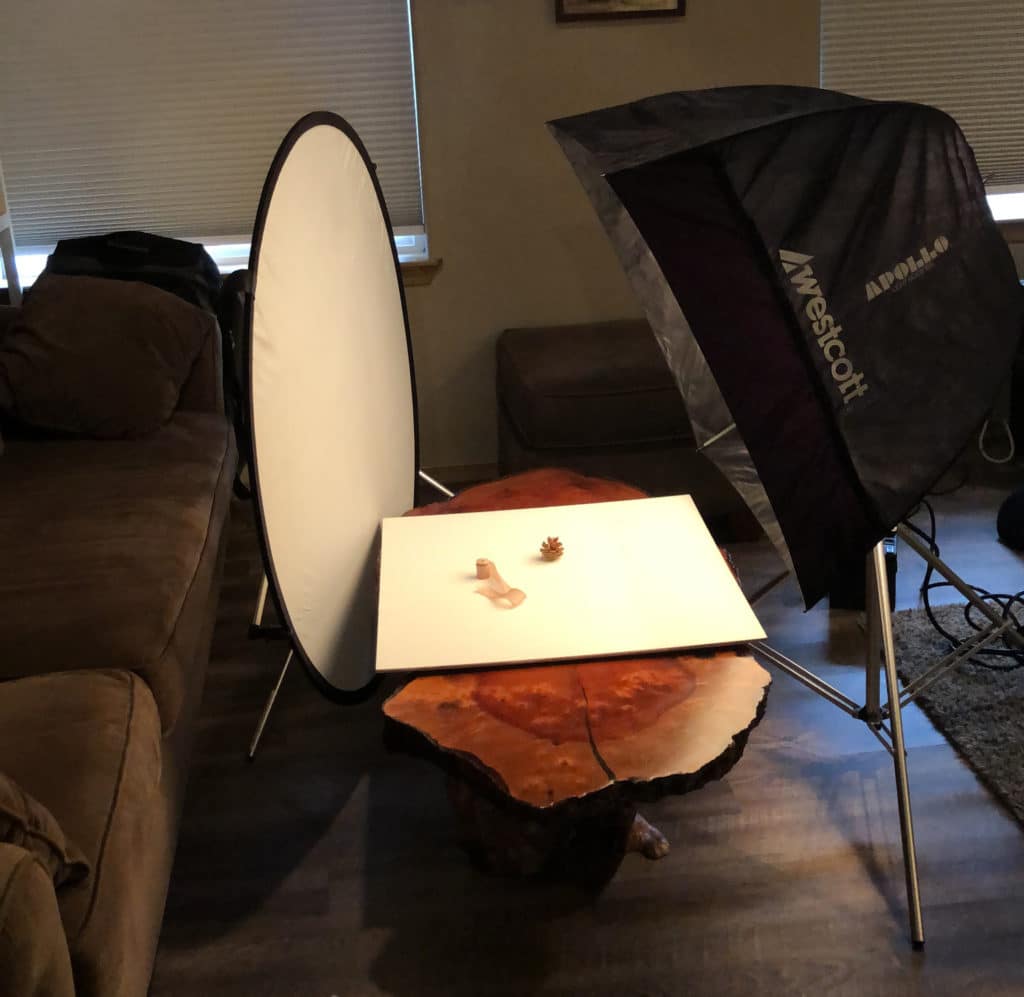
Invest in some lighting equipment. The cost of lighting equipment keeps coming down which is great for small businesses who are DIYing your product photography. Expect to invest a couple hundred dollars for it all. You can go cheap, but realize that you will end up buying the item again when the cheap one doesn’t work well.
The larger your light source, the softer it is, which makes for soft edged shadows and better product photos. This is why window light is great because it’s one huge 4 foot by 3 foot soft light source. If you don’t have the window, use a soft-box to create your soft diffuse product photography lighting. Here are some options for different light kits. You really can start with just one light and use white foam core boards for fill cards. The more lights you use the brighter your scene, and that is ideal for mobile cameras. Just keep in mind that using more than one light source makes things more complex.
Here are some options that are not pricy for creating a lighting setup in your home from Amazon.
Softbox kit for under $100
Softbox kit that will last longer, provide brighter light and will also have less flickering than the less expensive option above.
Light Boxes are a simple option for those with small items that need the white background.
For small and on the go needs, my favorite lighting accessory is a handheld video light.
*Amazon links are all affiliate links, meaning I get a small commission if you purchase. I only recommend products I would purchase myself.


The comments +