


Ever wonder how those images on Instagram always look so good, the product is perfectly styled and the background is beautiful, but you look at your home and don’t see anything that either aligns with your brand look?
The secret that many don’t know is the secret of a styling board.
What is a style board? It’s basically your own personal background for any small styled product shot you have. Now that you know about them, trust me, you’ll see the use of these boards all over Instagram.
And they are not that hard to create yourself. So I wanted to pull the curtain back and let you see how you can make your own style boards and maybe make your images look a little more polished.
How to create a DIY styling board for product photos

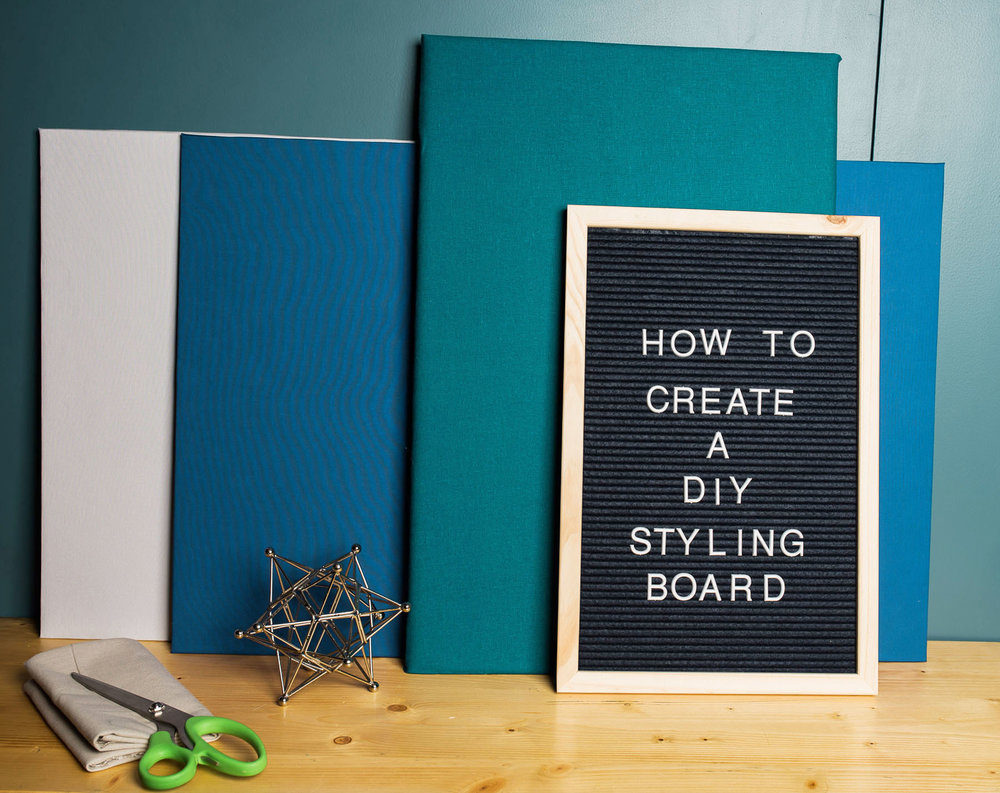
First I decided what background I wanted to use. I like the look of fabric as it gives a bit of texture and I picked a couple of different colors that would be good for backdrops as well as my brand colors for a good pop when needed.
For this time around, I chose to use foam core board and I found 18×24 size posterboard that actually had full adhesive down one side which was perfect. I bought my fabric and made sure to just buy enough to fit the board plus about 2″ more on each side to fold over the edges. I also picked up spray adhesive to go on the back.
I used a steamer to remove all wrinkles from the fabric before starting as it’s important the fabric is completely wrinkle free. You can probably do it with an iron too 🙂
I laid the fabric on the ground flat and wrinkle free as possible, then I pulled the adhesive off of the foam core and laid it flat on the fabric. The adhesive on the foam core is not very strong, but that’s okay, it doesn’t need to be.


I made sure that the fabric was nicely laid out on the board and sticking (even though it didn’t stick super well). Then I laid it back down on the ground fabric side down and sprayed the adhesive along the back edges of the board. I waited for a minute or two for the adhesive to get sticky and then I laid the fabric over it.
By using the adhesive on the back side, it held the front tight enough that the front adhesive held the fabric down perfectly well.
Voila, I have a styling board!
And you can see the photo on the right how I set up this photo of one of my products, and the final photo below of what it looks like!

What if you can’t find a board with a built-in adhesive side? Don’t worry I can help there too!
DIY Styling Board Using Adhesive Spray

You may be wondering whats up with the canvas, but I decided to recycle some of my old wall portraits that I don’t want anymore. The joy of being a photographer is that I have a stack of these over the years!
You can get canvas’s from Michaels or any craft/art store for pretty cheap.
So first I set the fabric down and then put the canvas over it and cut off the excess fabric I had in this case.
Then I steamed my green fabric to remove all the wrinkles and set it aside.
Then I took the spray adhesive and sprayed the canvas and then scrolled Instagram for a couple minutes while I waited for it to get sticky and a little less wet. This part is important as if you set the fabric down on the adhesive while it’s still wet, it will soak through and make for the potential wet discolored spot on your lay flat which you don’t want.
Then I laid the fabric wrinkle free on the ground and placed the canvas on the fabric, turned it around and made sure the at there were no wrinkles.
I then turned it back over and sprayed the edges of back to be able to lay the fabric over the back just like the last one.

*I’m noticing now that I don’t have all the steps photographed, but hopefully you get the idea*
Below you see the lay flat as my background in this product shot. You may not want to have such bold colors for your layflats, but I chose to do so as they are my branding colors.
I love the simple subtle texture for the fabric, but you could also use paint if you’d like, or even if you are looking for a design, you can use some of the stick and tack drawer liners on a board.

Another example of using the styling board for a styled image I posted on Instagram below! I used Canva to add text to the image to promote my blog post about my favorite business podcasts.

Some take away tips for your DIY styling boards
- If you need a bigger board, head over to Home Depot and pick up a 4’x4′ thin plywood then either paint it or do the same fabric cover. These are great when you find yourself photographing larger items
- If what you are photographing is heavier at all, you may want to do the plywood or a book board as I have noticed that if I set a heavier item on the foam core, there can be an indent in the board which you don’t want to have that happen. For example, a wine bottle put a little indent in my styling board.
- Keep it simple and on brand and you’ll succeed!


The comments +