


You know when it happens right? You pull out your iPhone to take a pic, snap a couple and then take a look and …it just looks off. The color is way different than it should be, but why?
Your photo can look orange, yellow or even blue when the white balance is off which will ruin your photo and make it look amateur.
You don’t want that, as the higher quality images you produce for your business, the more you capture your audience’s attention.
Which is the whole point of figuring out how to take better photos in the first place right? Audience attention and connection.
So why is this wonky color happening?
The thing that is happening is your camera is confused by the light in the photo and doesn’t quite know which white balance to choose.
My top hack for avoiding those ugly color shifts is to understand that each type of light has a different temperature and looks different to your camera. The different temperatures translate as color shifts in your photo.
To make your camera happy, have only one light source.
Common light sources and how your camera sees them:
- Candlelight which is seen as a super warm (orange) light to your camera
- Indoor household light is also a super warm (orangish yellow) light
- Sunny Daylight is a cool (blue) light *your phone’s flash is balanced to look like daylight, so it also is a blue light
- Shade is a really cool (blue) light
- Sunset and Sunrise are much warmer (yellow) light than mid day sun
- Florescent is an artificial looking light that has a green hue and is the least appealing color of light. (in other words, avoid shooting in fluorescent lights)
The thing about your phone is that it’s super smart. It can adjust to make the scene look like it does to our eye as long as it’s only seeing one light source.
It’s when you have multiple light sources, that is when your camera gets confused, and your color starts to get wonky.
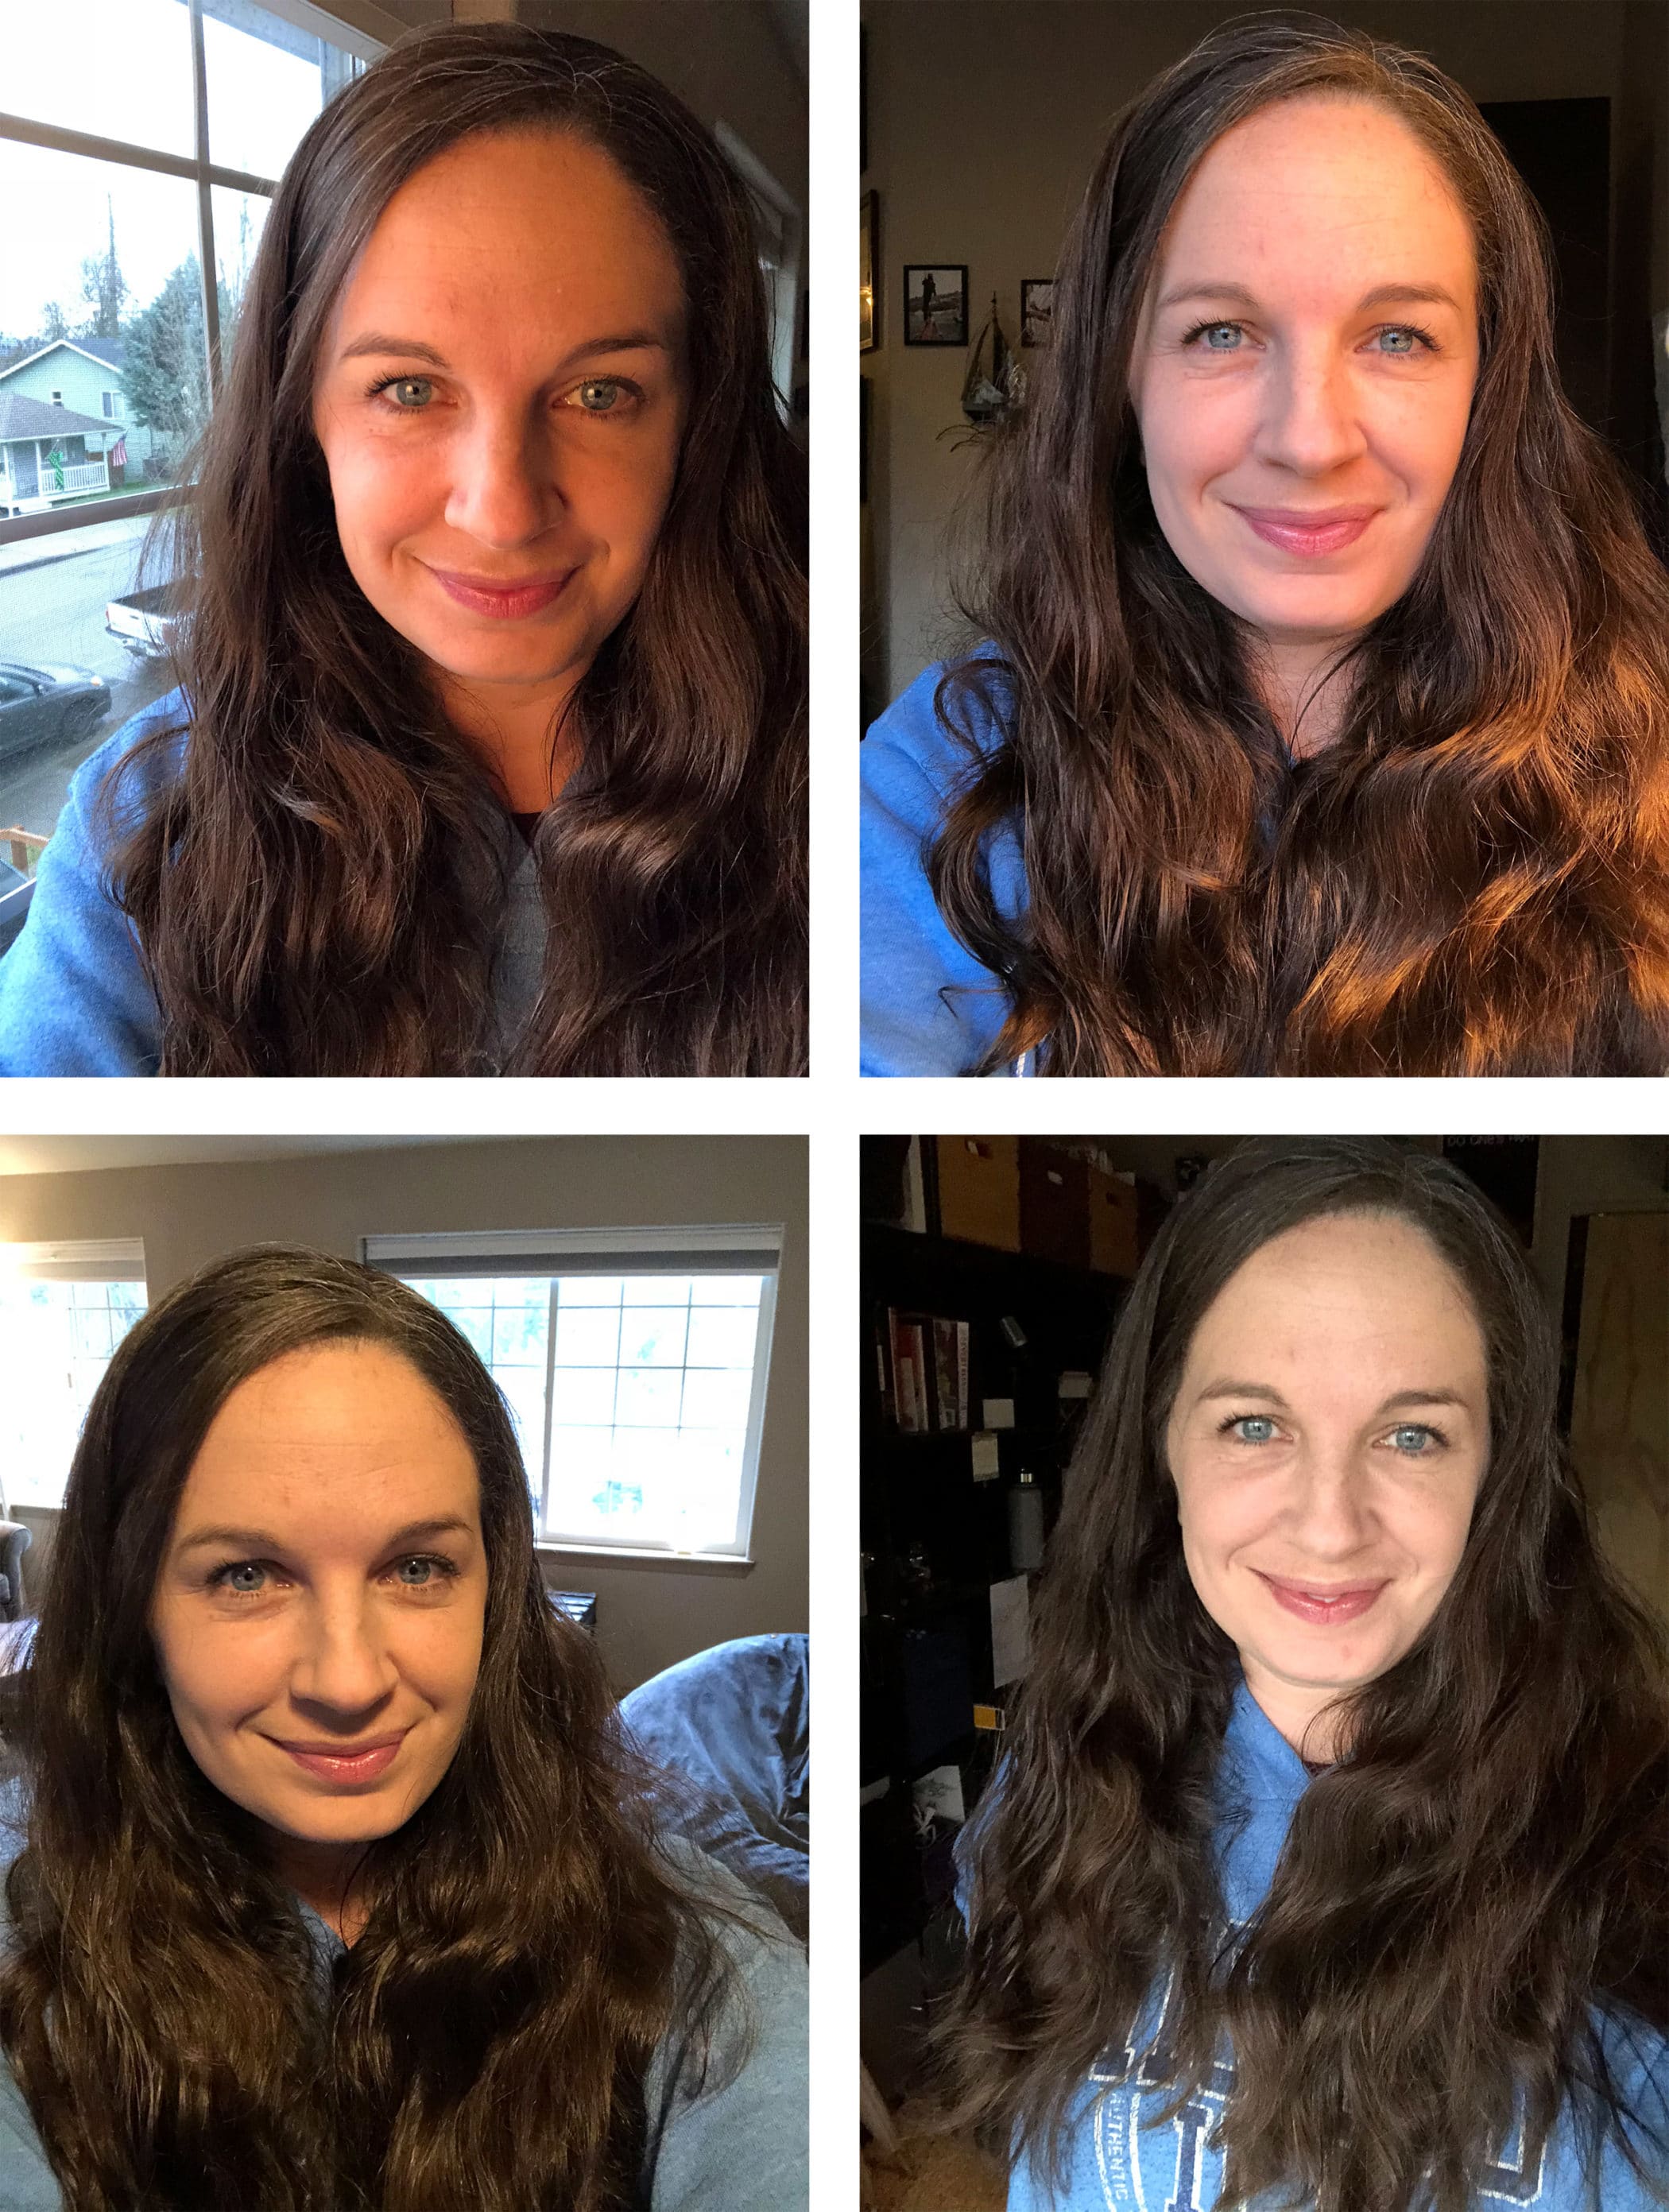
Check out the images below to see the difference turning lights on and off can make. These images were taken moments apart in my living room. The only change is that I turned the indoor lights on and off depending on the image. Check out the captions below to see the results.
To understand what you are looking at, and what light is affecting the image but not in the photo to see, there is a large window directly behind camera that is illuminating my daughter. There is an indoor lamp to the left of camera next to the window. There is a large window behind my daughter that you see and there are the dining room lights you see as well. Each image I turned on or off the indoor lights. You can see in the explanation below!

If you can’t tell, the goal of the images above is to find the one where her skin tone and the room looks closest to the color our eye sees. The most accurate one is the image on the far right which is all window light, and only one light source for the camera to adjust to.
Mixed lighting like the 3 left photos above, is when you have window light which is a cool light, and your household light which is warm, your camera is trying to figure out if it should adjust for the cool or the warm tones.
Many times, it gets stuck, trying to do both and you end up with photos that have super wonky color. Or it adjusts the wrong way making a blue image or an overly yellow image like you see above and below.
See examples below of when the camera didn’t know what to do because of a mix of indoor light and daylight from the windows.
 Here is a good example of when the camera doesn’t know what to do. I wanted to capture the moment here as my husband helped my son solder a circuit board for a DIY radio, so I shot without planning (as to not miss the moment which was more important to me than the lighting). But again the camera was confused as the people are lit by indoor lights and the rest of the image has windows in it, which has much more blue light. The camera chose to balance for the window (see how that roof looks like it should as well as the leaves) but my family has the fake-n-bake look).
Color balance confusion is the reason why sometimes your photos look crazy orange, blue or green. Make yourself aware of what your light sources are, and you can remove the problem.
So, again, what do you do to avoid these fake-n-bake type situations?
Pro Tip – Shoot with only 1 light source.
Your camera will automatically adjust to what it thinks is the right light temp to give you a great looking photo, but it can only adjust to one light source at a time.
You can choose if your light source is daylight (a blue temp), or indoor lights (a much more orange light), but I’d always avoid fluorescent lights (a super green light which makes people look deathly).
Avoid this mistake:
Don’t think that you can just “edit the photo later”.
The color will never be what it should, the image quality will get muckier as your continue making tweaks and your quality of image will greatly suffer.
When you’re shooting with a smartphone, you want to correct the problem before the photo is taken and not try and fix it editing the jpg as it will never look quite right.
See examples where the camera white balance went wonky and why below.
 Notice that the hall is super orange, and the front walls (the left and right edge of the photo) are not. As well as the color of the front and back of the dog don’t match. Here I was trying to take a photo of my dog with his ball, there are windows right out of frame on the left and on the right just past the hallway. My dog is a cream colored golden retriever, and the camera did a good job adjusting to the color he should be. But since I have the lights on in the hallway, you see the hallway turns super orange and the back of the dog is orange even though in real life, he’s all one color 🙂 This is another example of having two light sources. To remove this problem, I should have either turned off the hall lights, or moved him farther back in the hallway to remove the window lights.
 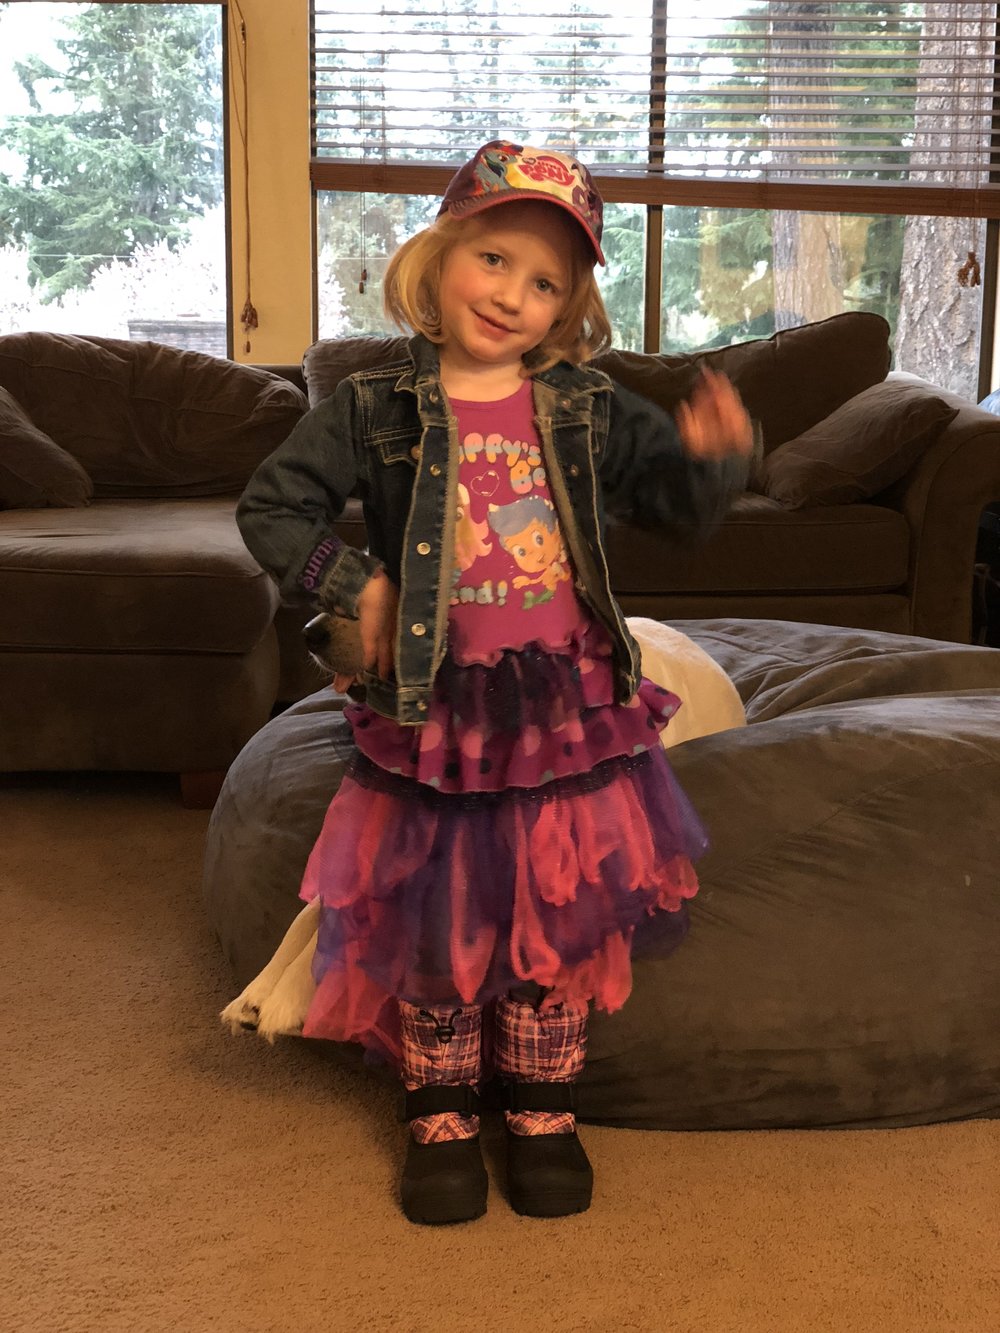 Why is this image so orange?? I confused the camera here as the light in front of my daughter is indoor lights (orange cast) but the windows behind my daughter are daylight (blue cast) and since the daylight area takes up more space in the frame then she does, the camera adjusted to daylight and turned her orange. There is another big window behind me, so what I could have easily done is turned off the overhead light. Then we’d only have window light and she wouldn’t look like she fake-n-bakes 🙂 As for her outfit, that is 100% her style 🙂 And yes, she went to school wearing that that day 😛
Tips for shooting with just one light source:
- If you are inside w/ windows nearby and also the indoor lights on, then remove one of the sources. Either close the window or turn off the inside lights.
- My suggestion 95% of the time, will be to use the window light and turn off your indoor lights because the window light will be more flattering because of the size and angle of the light.
- Always avoid shooting under fluorescent light as it is extremely unflattering color wise and is what causes the green color shifts.
- When possible, just take your subject outside to a shady area and use that light. Just make sure to not be under trees as the filtered light from the trees will make you look green.
If you make yourself aware of this one simple thing, you will start to create images that look higher quality and people will engage more with your content!


So helpful Rebecca – makes total sense! If you turn off the lights and use window light but it is kind of dark – is there a fix for that? Thanks!
Hey Ruth!
You can watch the area of your home that your shooting in and see what time of day is the brightest to help with that. Honestly your phone will adjust to the dark and will still give you a decent exposure, you may just want to make sure to hold the phone in the same spot for a second longer so things don’t end up blurry.
Since I know you, I’m assuming you are taking photos of your invites on a white background right?
You probably have a different issue, in that your camera is making the image darker than you want it to be because most of the image is white, and your camera is confused again.
Your camera is trying to look for a middle grey tone to find the exposure, and when the frame is mostly white, the camera will make the image darker because it thinks the white should be grey.
In that case, then you touch the screen where you want the focus to be, and a little yellow box will appear. Hold your finger on the phone and that box will kinda jump for a sec and then it will say AE/AF Lock in yellow at the top. What you do then is touch to the right of the yellow box, a vertical line will appear and you slide it up.
What you are doing is overriding the exposure the camera thinks you should be at, brightening the image and making your whites actually white.
I use this trick daily!
Let me know if that fixes your dark problem!
-Becca
Such great advice… and SUCH and adorable subject to photograph!! 🙂
Thanks Cindee! She is a cutie isn’t she?!