
It’s no secret that lighting is critical for great photos.
With how amazing technology is these days, it’s less and less about what camera you use.
It’s more about being able to see when light is looking good and when it’s better to skip the photo.
If you train your eye to see light in your everyday, you can create beautiful images with any camera you have with you.
Here are my 5 lighting tips that will transform your photos
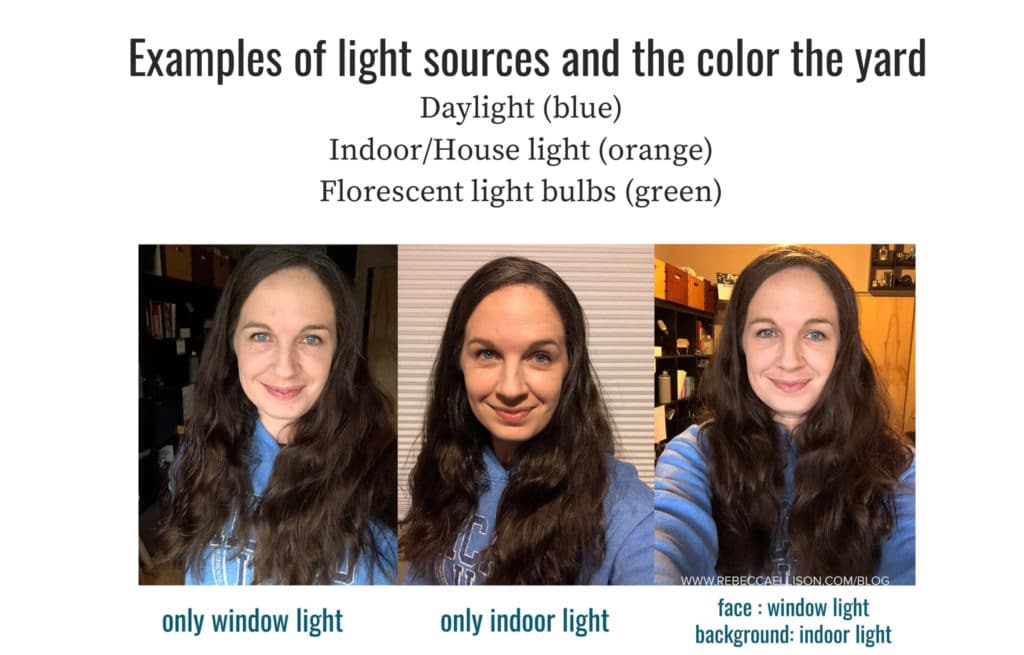
Tip 1 : Don’t use mixed light.
What is mixed lighting?
It’s when you have a mixture between indoor yellow light and outdoor blue light in the same scene.
Your camera sees light as color and can adjust to the correct setting for one color, but the second you add a second light source to the scene, the camera gets confused and this is when you start seeing blue or orange tones in your images.
Daylight is a blue light and indoor light is a very warm/yellow light. Blue and yellow are opposites on the color spectrum, so that is why you see such funky colors.
To start getting much better images, always avoid mixing light sources!
Read more about how to avoid orange color casts in your photos in this post.

Tip 2: Stand in shade near direct light but not it it
This tip is easy and yet works so great!
When it’s a sunny day, so many people assume you jump out and take photos in the sun, but no… that is not what you want to do.
You want to stay in the shade, but just barely as you want the sunny day to still illuminate you.
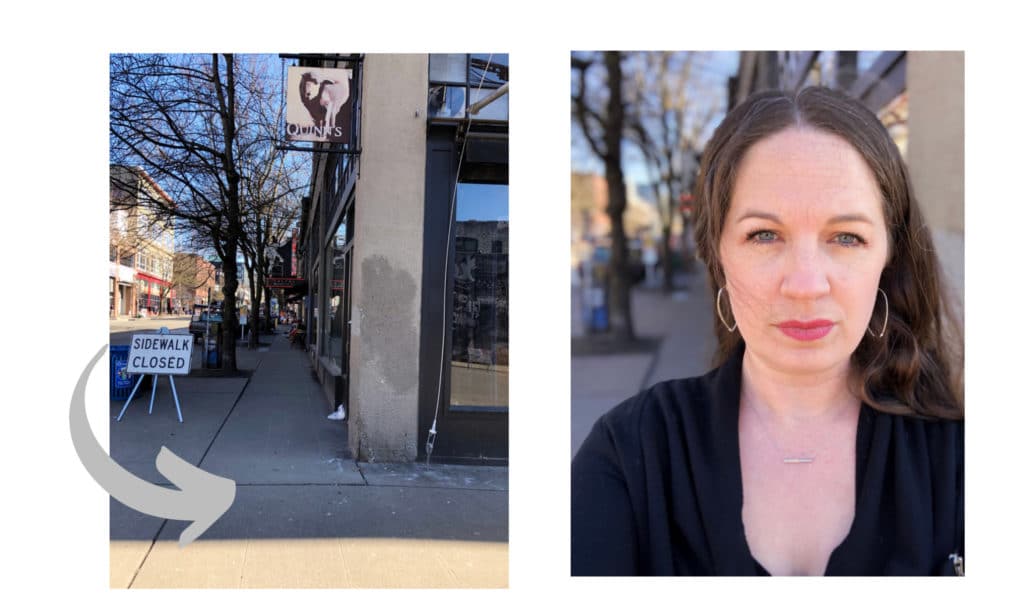
The photo below is a street scene.
The arrow is point to where I was standing to take the photo on the right.
My feet were just barely in the shade so I was the closest I could be to being in direct sun without being in direct light.
This way the brightness of the surrounding area lights up my scene, but my face is still nice and evenly illuminated!
Tip3: Watch for bright spots on faces
Another mistake amateurs make is to not look how the light is looking on the subjects face.
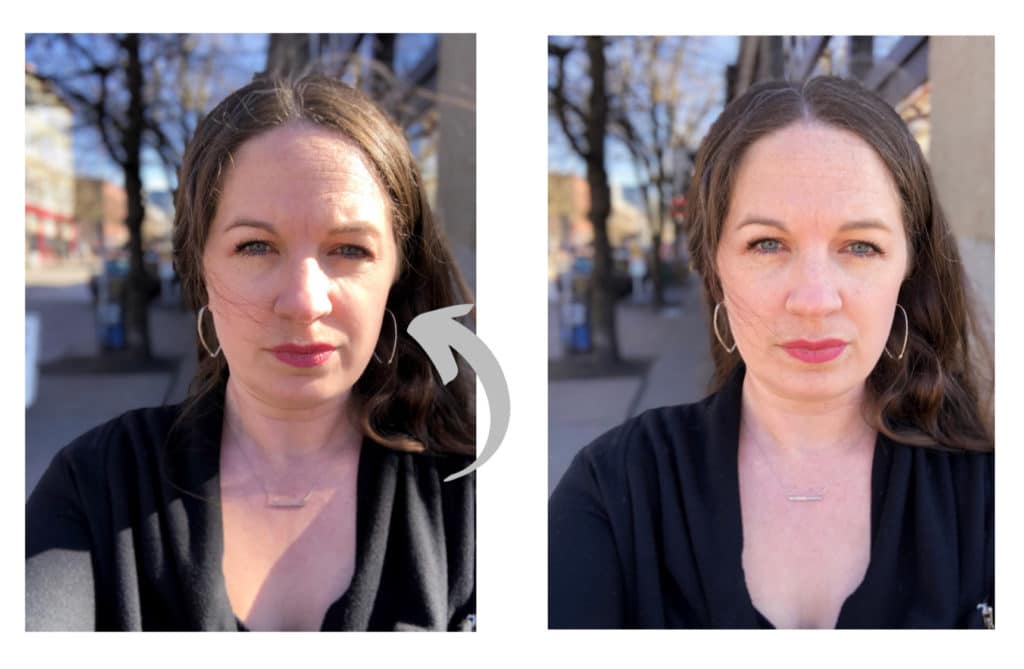
This photo on the left below is not a great photo because of the hot (bright) spots on my face.
The sun is hitting the right side of my face directly causing attention to go to my brow bone and the side of my nose.
Not cute.
The image to the right I took a 6″ step back into the shade and that is how different the photo can look!
(Don’t pay any attention to the concentrated look on my face as I always feel silly taking selfies in public 🤣).
See how a small change into moving into the shade made in the quality of the image?
Tip 4: Use Window Light
Windows should be your best friend when taking photos.
Always default to finding a window with indirect bright light coming in.
The light is bright but the light isn’t directly coming into the window so it’s nice and soft, and yet it’s directional.
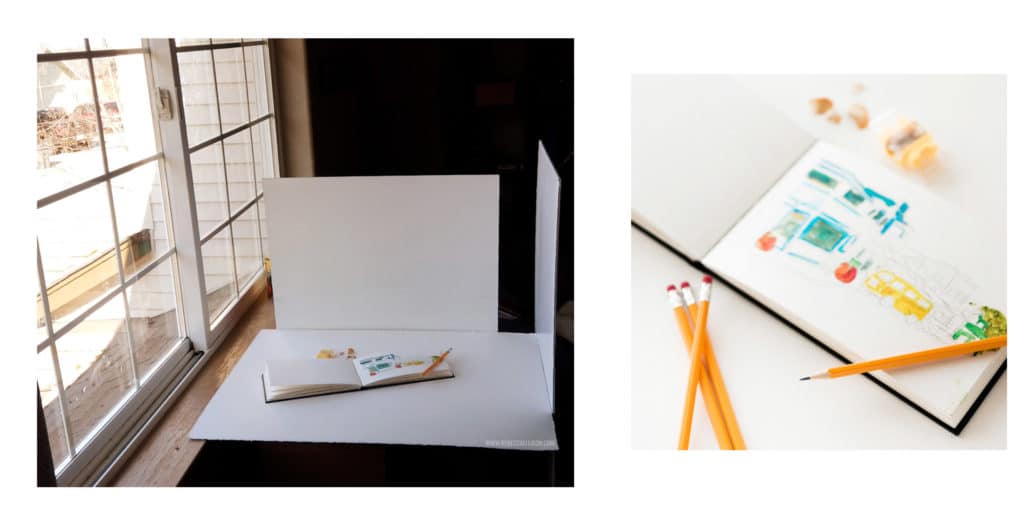
Use a white board opposite the window as a fill card bouncing light back into the scene and filling in your shadows. This works amazingly well on product photos as well as people photos!
Tip 5: Always look for the direction the light is coming from
You always want to pay attention to the direction light is coming from to see how it will affect your image.
The shadows will always show you the direction of light and how it will play into the story of your image.
Even in shaded areas, there is direction.
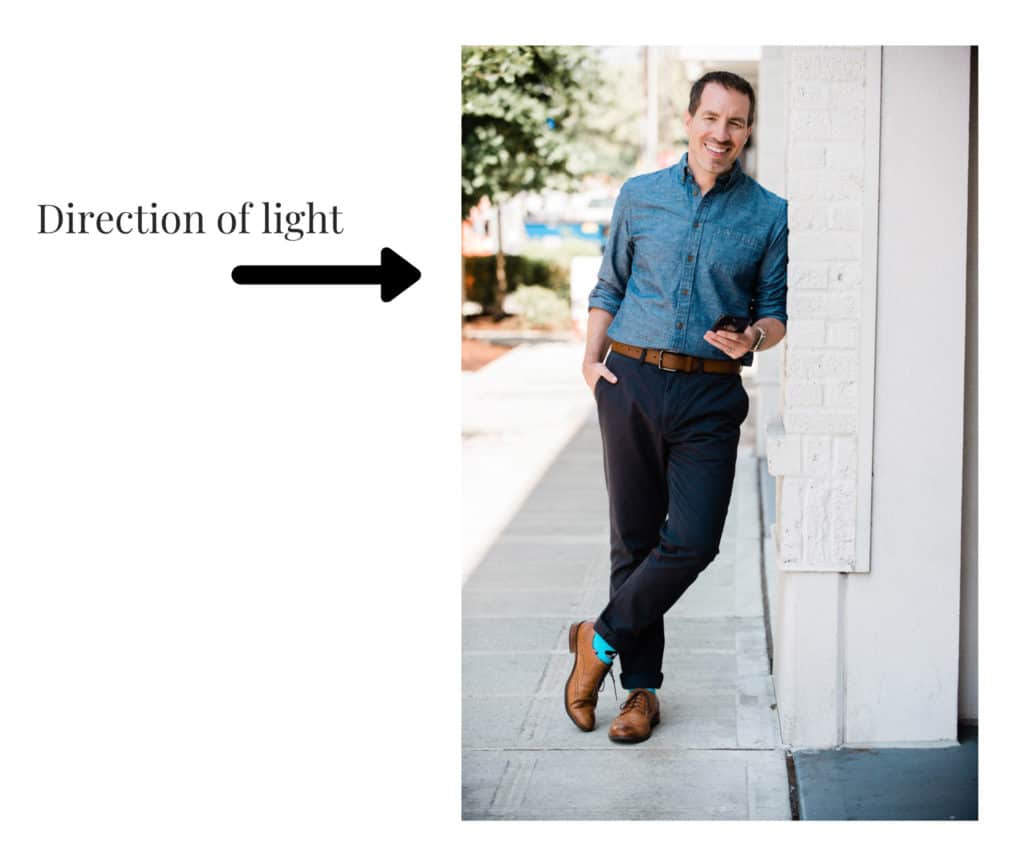
So the photo below, it’s a sunny day, but we are standing in the shade, you can see that the direct sun is hitting the sidewalk next to us, and my client was leaning against a white building.
This light then is coming in from the left and hitting the building bouncing light into the right side of his face.
Now while we were in shade, the way the light hits his face and his body still is important to how you feel in the image!
As you can see, there are plenty of attributes about light and how it can affect your photo that you can teach yourself to see.
Lighting does not have to be complex to be beautiful, but it does have to be beautiful to tell the story you are conveying in your image!
Keep Reading : How to Pose for Photos so you Look Great

The comments +